Proprioception can help improve your ability to know your bodies position, which can be extremely beneficial.
In sports, it can be the difference, between being the zero or the hero.
Proprioception plays a big role in someone’s performance.
It’s one’s ability to move fluid and naturally. The quick cuts that we see in football, soccer, basketball, etc… it’s almost completely dependent on balance.
[PRO-pree-o-SEP-shən]
Definition: 1. A sense or perception, usually at a subconscious level, of the movements and position of the body and especially its limbs, independent of vision; this sense is gained primarily from input from sensory nerve terminals in muscles and tendons (muscle spindles) and the fibrous capsule of joints combined with input from the vestibular apparatus.
In other words, proprioception is the ability to determine the position of a joint in space. The ability to do this is done using mechanoreceptors that are found in both muscle and joints.
This is important to train whether you are recovering from an injury or are trying to improve balance and prevent future injuries.
Our body relies on these receptors and the central nervous system (the brain and spinal cord) to interpret and integrate the information it receives and then control the muscle and joints to produce a coordinated movement.
The joint mechanoreceptors are found in ligaments, capsules, menisci (cartilage), and skin. The different joint mechanoreceptors include:
Located in:
- Joint capsule, ligaments, and skin
- Sensitive to:
- Touch, tension, and possibly heat
- Changes in the position of the joint, and the rate and direction of the movement
- Pacinian corpuscles
- Located in the skin
- Sensitive to deep pressure
- Merkel’s corpuscles
- Located in the skin
- Sensitive to deep pressure, but respond more slowly than Pacinian corpuscles
- Meissner’s corpuscles
- Located in the skin
- Sensitive to light touch
- Free Nerve endings
- Extreme mechanical, thermal, or chemical energy
- Respond to:
- Harmful stimuli — impending or actual tissue damage
- Before the 1970s, they were thought to be the sole receptors for joint proprioception
- However, it’s now known that they aren’t and work in a complementary fashion with muscle receptors.
- Muscle mechanoreceptors play a more important role in joint proprioception
As discussed in the stretching exercise guide, the muscle has two mechanoreceptors, muscle spindles, and Golgi tendons. You can refer there for an in-depth look at how they work.
After an injury
After an injury, there are several components in a rehabilitation program. After swelling/inflammation, and pain are under control, one of the next steps is to regain what is called neuromuscular control.
When an injury occurs and you have your joint immobilized and/or take time off to rest, your central nervous system, in simple terms, it forgets how to put together and interpret the information it is receiving from the joint and muscle mechanoreceptors.
So now comes the question. How does someone regain this control?
Regaining neuromuscular control means restoring a previously established sensory pattern.
Four elements are critical for reestablishing neuromuscular control:
- Proprioception and kinaesthesia (ability to detect movement)
- Dynamic stability
- Preparatory and reactive muscle characteristics
- Conscious and unconscious functional motor patterns.
- Re-learning normal movement patterns and timing can take several months.
So, now that you know all the benefits of proprioception you probably want to get started on training.
So how do you train proprioception?
It requires many repetitions of the same movement, that goes from simple movements to more complex.
Guide to gaining better balance and proprioception
Lower Body
Ankle Alphabet
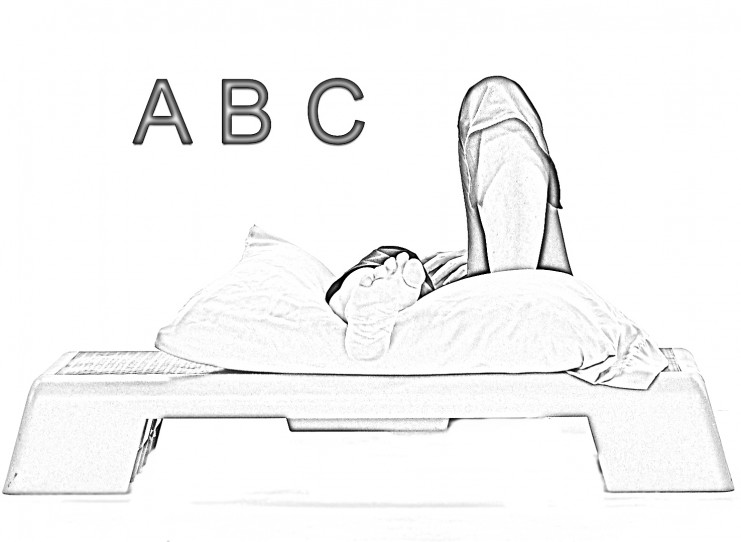
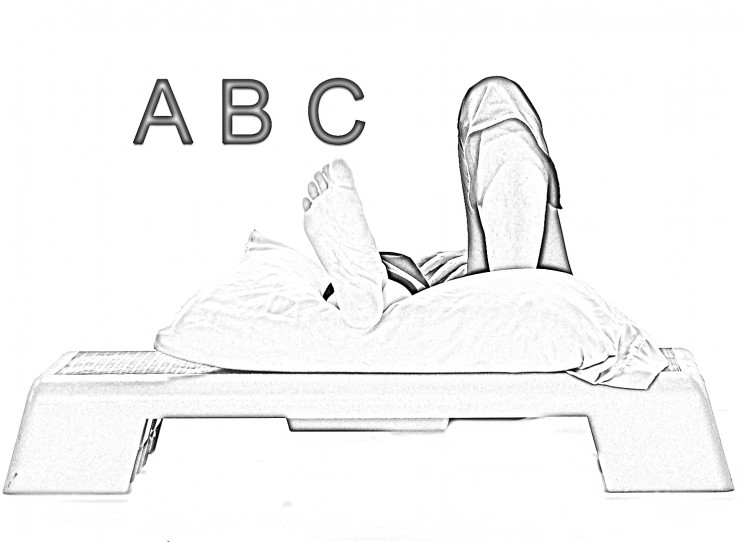
- Lie or sit.
- With as big movements as possible, draw the letter A with your toes.
- Follow this with the letter B and so on.
- Continue through the letters as advised.
Tandem Balance
- Stand on a firm surface.
- Place one foot directly in front of the other.
- Maintain your upright posture.
- Switch feet, and repeat
- Progress by standing on a folded towel then on a pillow.
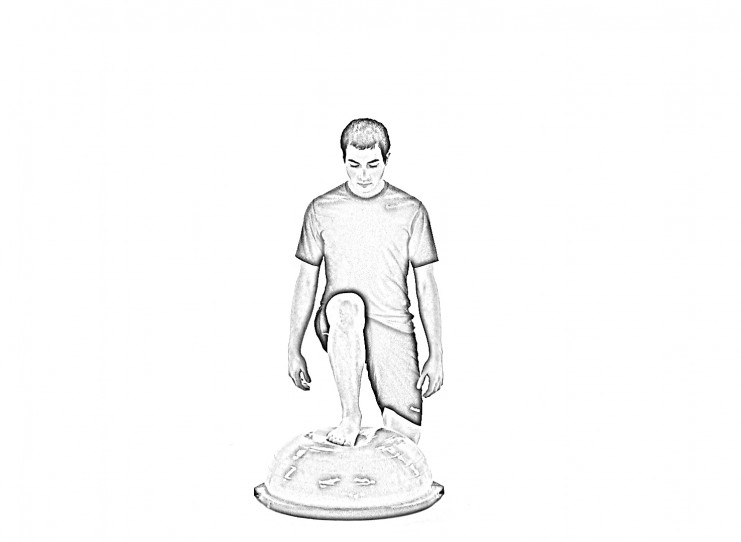
Single Leg Stance (SLS)
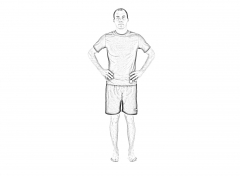
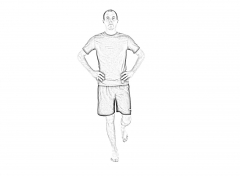
- Stand in front of a counter or wall if needed to maintain balance.
- Lift one leg off the ground so as to stand on the affected leg without losing your balance.
- Goal – 30s to 1min
- Repeat 3-5 times
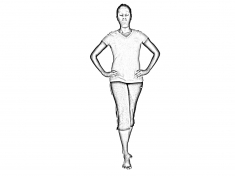
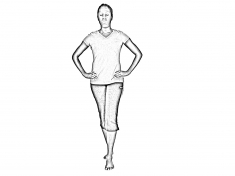
Proprioception Alphabet

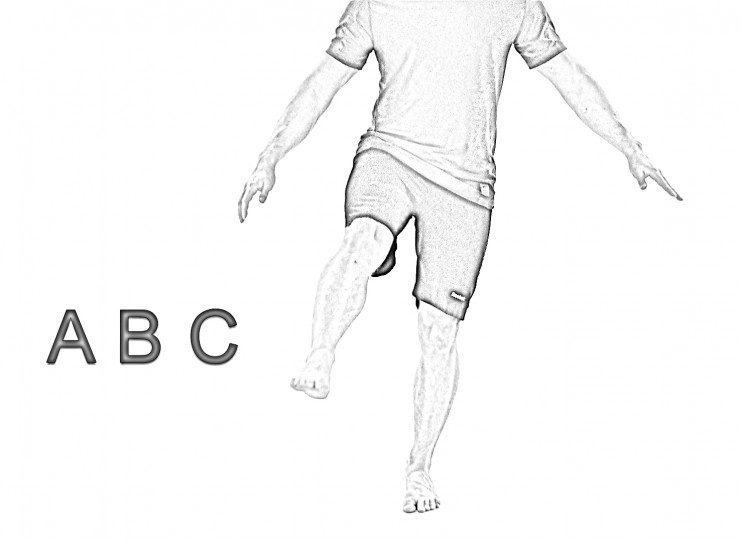
- Stand on one leg (injured leg) with your knee straight.
- Have the opposite leg move forwards and draws the letters of the alphabet in the air, trying to keep your balance on the stance leg.
- Increase the difficulty by slightly bending the stance leg.
Toe Walk
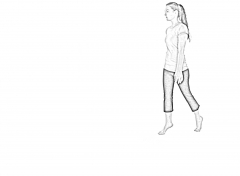
- Stand.
- Walk on your toes and lift your heels as high as you can.
- Hold on to a solid object if needed.
Heel Walk
- Stand.
- Walk on your heels and lift your forefoot as high as you can.
- Hold on to a solid object if needed.
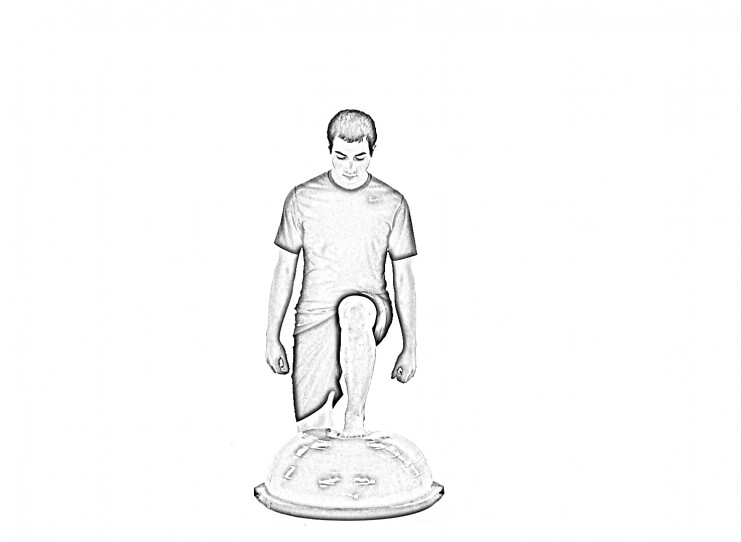
Single Leg Stance (SLS) (On cushion)
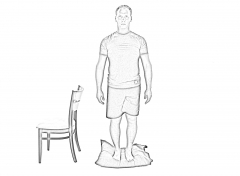
- Stand on a cushion/pillow (anything that makes it unstable) with your feet comfortably apart.
- Lift one foot and balance yourself on the other leg.
- Hold for prescribed time
- Get back on two feet and repeat.
Goal: 1 min || Repeat 3-5 times
Note:
Single Leg Stance (SLS) Clock
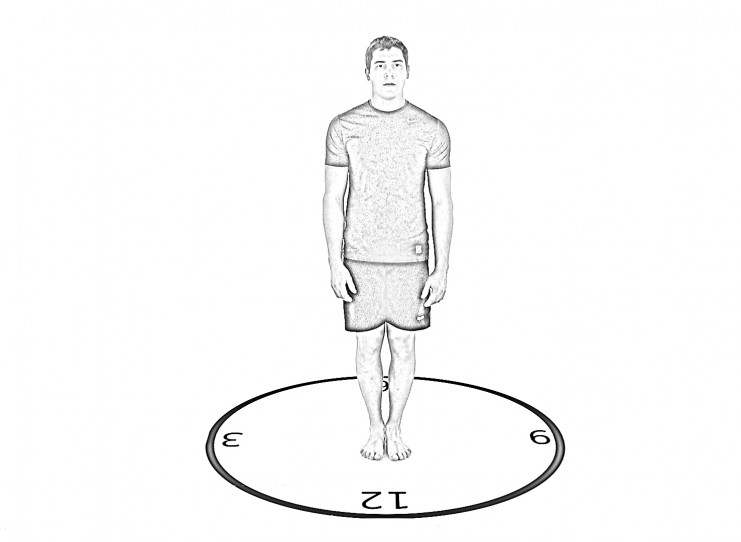
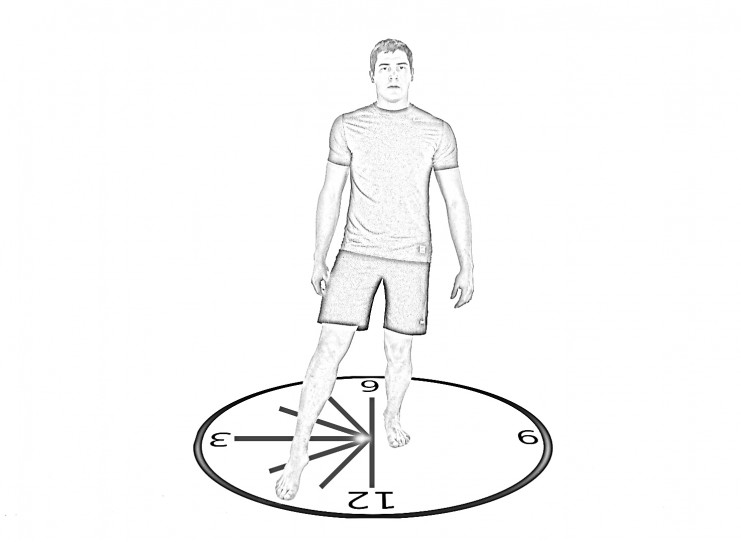
- Stand on one leg and lightly tap the floor on an imaginary clock around you. Bend your support knee slightly.
- Start with tapping forward (12 o’clock) and continue your way to 1, 2, 3, 4, 5 and 6.
- Keep your balance.
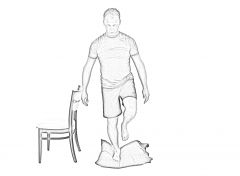
One Leg Toe Touch (Deadlift)
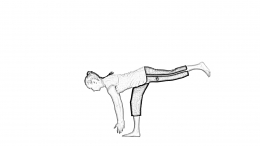
- Standing upright on one leg, tip the body forward, hinging at the hips and keeping the back straight. Touch or try to touch the floor and use hamstring to lift you back to the starting position.
- Make sure that your knee is aligned with your foot and hips and keep your hips and lower back level as you go down.
Stabilization Squat
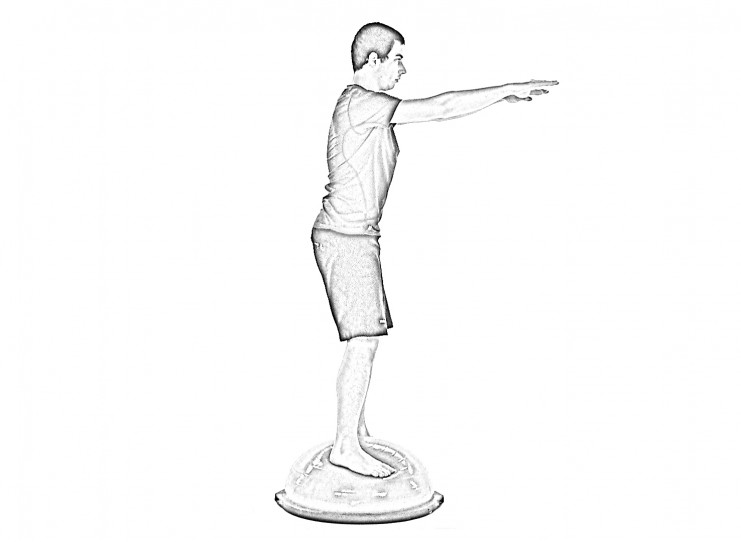
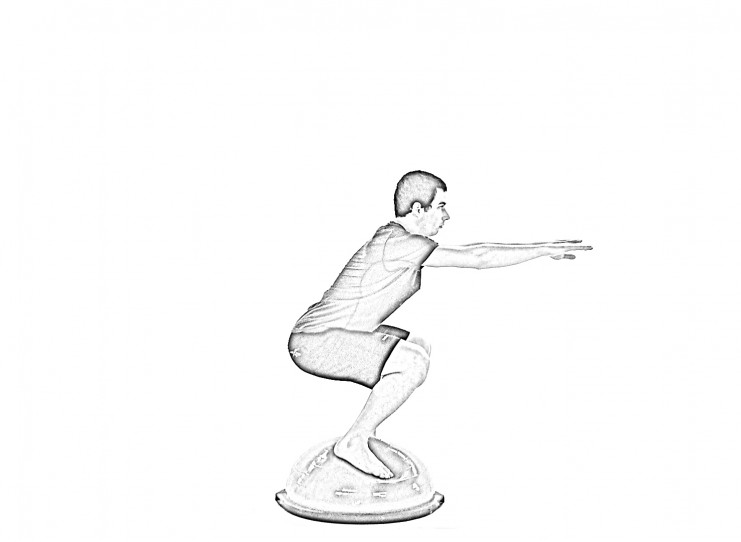
- Stand on the round part of Bosu ball with feet facing forward at hip width apart and arms out in front of body.
- Slowly lower body until knees are flexed to 90 degrees (don’t go as low as picture)
- Try to maintain your balance, your back straight (slightly arched) and your kneecap aligned with 2nd toe at all times.
- Return to standing position and repeat.
Stabilization Lunge
- Stand in front of a bosu.
- Take a step, placing your foot on the round part of the bosu.
- Lower your body down bending, your knees to 90 degrees, keeping your back straight (slightly arched) and your kneecap aligned with the second toe.
- Return and repeat.
Upper Body
Proprioception Alphabet with weight
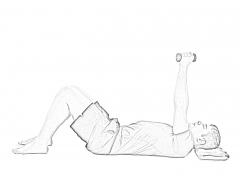
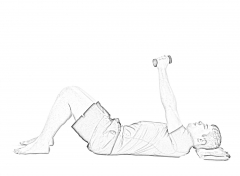
- Lie on your back with your knees bent and your back flat on the floor.
- Extend your arm in front of you holding a weight in your hand.
- Slowly draw out the letters of the alphabet with the arm, keeping your body, shoulder blades and head stable.
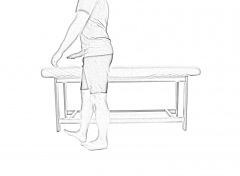
Alphabet on wall with a ball
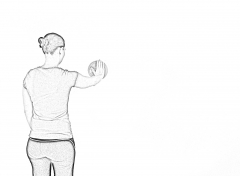
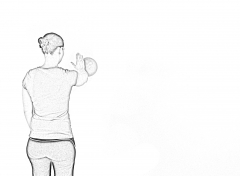
- Stand with your arm extended in front of you at shoulder height, holding a ball against a wall.
- Pull the tip of your shoulder backwards and slowly draw out the letters of the alphabet with the arm, keeping the shoulder blade stable and chin tucked-in.
- Relax and repeat.
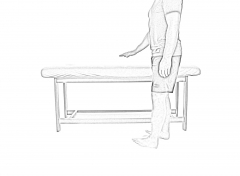
Prone Ball Toss
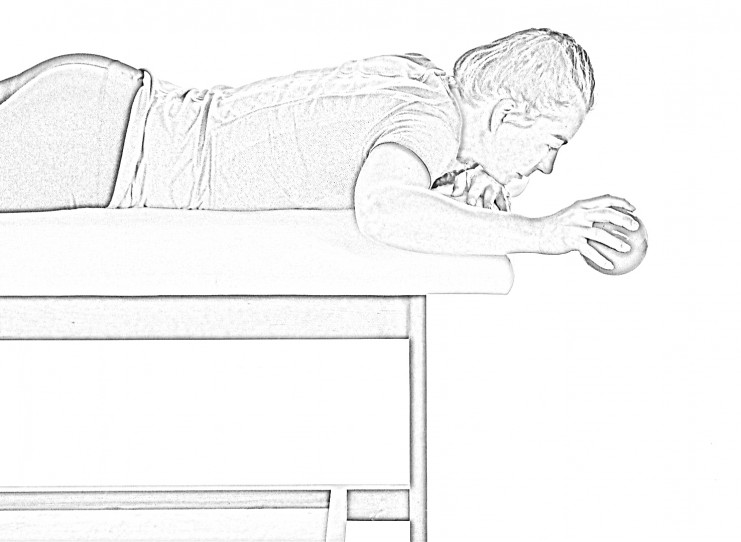
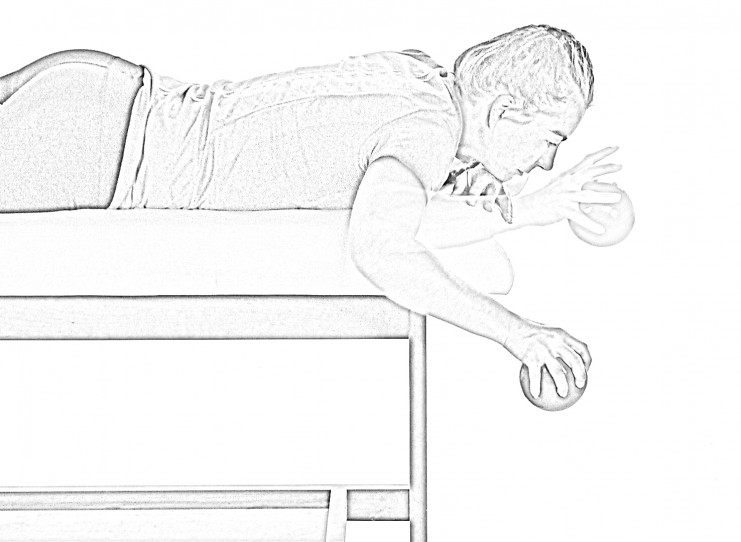
- Lie down on the edge of a bed or table.
- Pull your shoulder blade toward the middle of your back and lift your arm up and out from your body.
- Bend your elbow so your palm faces down toward the floor.
- Hold a small weighted ball in your hand in this position. (can start with a unweighted ball ex, tennis ball)
- Release and then catch the ball repeatedly, allowing it to barely fall from your hand.
- Maintain the position of your arm and shoulder blade throughout the ball tosses.
Don’t miss out!
Subscribe to our newsletter to get your free copy of our stretching guide and get notifications when we make a new post to help you reach your fitness goals.