Myofascial Release
Myofascial release can help with pain due to what it is commonly referred to as ‘trigger points’ which can be described as small, hyperirritable areas within a muscle. (Prentice, 2014)
This can then be expressed as referred pain, which means that the pain can occur away from the actual site of irritation.
When it comes to myofascial release, as described in the definition, you are trying to release tension in the fascia.
Myofascial Release [my-o-FASH-e-ul]
Definition
1. A type of soft tissue therapy used in osteopathy to release physically restricted musculoskeletal groups. It is believed that chronic tension and trauma cause the fascia, which envelop muscle, to become fixed in a particular position, known as a myofascial restriction. Manipulation of the myofascial group is believed to resolve the restriction.
Cite: Segen’s Medical Dictionary. © 2012 Farlex, Inc. All rights reserved.
Fascia [fash′ē·ə] pl. fasciae
Definition
1. The fibrous connective membrane of the body that may be separated from other specifically organized structures, such as the tendons, the aponeuroses, and the ligaments, and that covers, supports, and separates muscles. It varies in thickness and density and in the amounts of fat, collagenous fiber, elastic fiber, and tissue fluid it contains. Kinds of fasciae are deep fascia, subcutaneous fascia, and subserous fascia. fascial, adj.
Cite: Mosby’s Medical Dictionary, 9th edition. © 2009, Elsevier.
During movement, the fascia must be able to move and stretch freely. If there is damage to the fascia due to injury, inflammation, or disease then issues will occur. Like mentioned earlier, myofascial pain tends to be referred, so it will not only affect the site of injury but also radiate to other structures.
Tightness must be released in all areas, and not only the area of injury. To utilize myofascial release to reduce tension, gentle pressure can be applied to the areas over a long period of time.
This pressure can be done using multiple techniques, such as:
- Graston technique
- Strain/counterstrain
- Foam roller
- Use of a ball to create pressure
The myofascial release exercises below show the use of a foam roller and myofascial ball. Both are techniques that you are able to utilize without the help of a partner/physiotherapist.
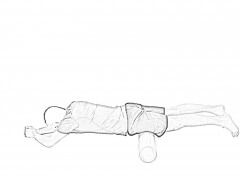
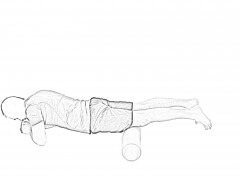
- Place the foam roller on the floor and lie on your stomach with the front of your thighs over the foam roller.
- Roll the entire front of the thighs from the top of the hips to the top of the knee caps in an up and down motion.
- You should pull yourself with your elbows and forearms.
- Pause at any spots that feel especially tender.
- Keep your quadriceps relaxed.
- Tighten abs and maintain proper low back posture during the exercise.
- Rotate to ensure you get the inside, outside, and mid thigh.
- Don’t roll over the knee joint!
Foam Rolling Calf
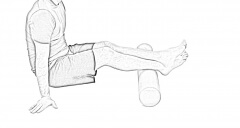
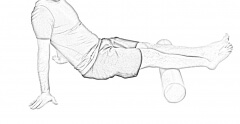
- Place the foam roller between the Achilles tendon (near the heel) and calf muscle.
- Cross the other leg over the leg being treated to increase the pressure if needed.
- Roll the entire calf in an up and down motion.
- Pause at any spots that feel especially tender.
- Keep your calf relaxed.
- Rotate the leg to get the inside, outside, and mid calf.
- Don’t roll over the knee joint!
Foam Rolling IT Band
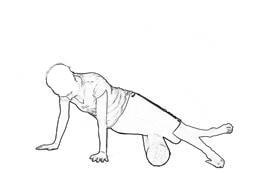
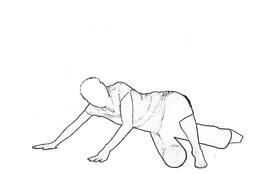
- Place your foam roller on the floor. Take a side plank position with the outside of one hip over the foam roller and your other leg in front for support.
- Roll the entire outside of your leg from your pelvis to your knee in an up and down motion.
- Pause at any spots that feel especially tender.
- Avoid the hip bone and knee joint.
- Can stack legs on top of each other for extra pressure, if needed.
Foam Rolling Hamstrings
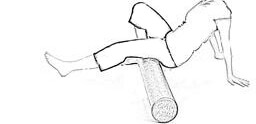
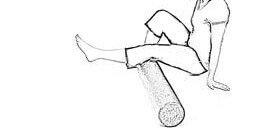
- Place a foam roller on the floor and sit on the floor supporting yourself with your hands. Place the back of one thigh over the foam roller and the other leg on the floor for support.
- Roll the entire back of your thigh from the bottom of the buttock to your knee in an up and down motion.
- Tighten abs and maintain proper low back posture during the exercise.
- Pause at any spots that feel especially tender.
- Don’t roll over the knee joint!
- Can place supporting leg on top to increase pressure.
Foam Rolling Adductors
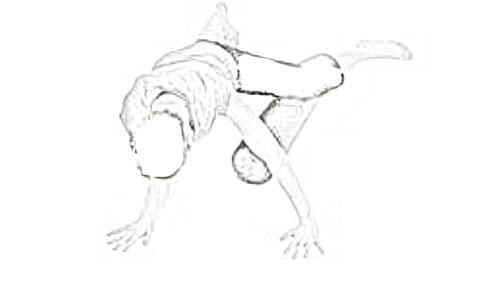
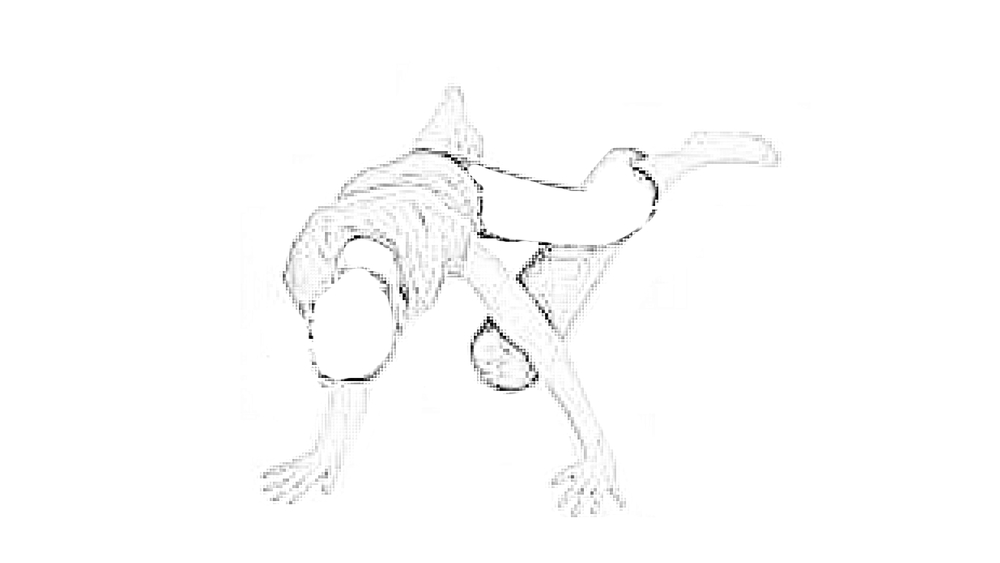
- Place your foam roller on the floor and lie on your stomach with the inside of one thigh over the Foam Roller and your other leg straight on the floor for support.
- Roll the entire inside of your thigh from your groin to your knee in a side to side motion.
- Tighten abs and maintain proper low back posture during the exercise.
- Pause at any spots that feel especially tender.
- Don’t roll over the knee joint!
Foam Rolling Glutes
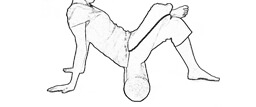
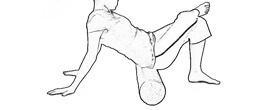
- Sit on a Foam Roller and bend your knees up to your chest with your feet flat on the floor.
- Bring both knees to the side with your opposite arm across your body.
- Roll the glute muscles.
Foam Rolling Lats and Teres Major
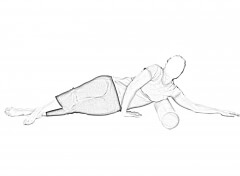
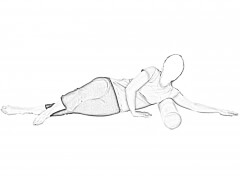
- Lie on your side with a Foam Roller placed slightly lower than your armpit.
- Roll on the foam roller from the armpit to the lower ribs using slow movement, stopping as recommended on the tight spots that are more uncomfortable.
- You want to be on the teres major and latissimus dorsi muscles, don’t roll directly on your ribs.
- Don’t roll over shoulder joint!
Thoracic ext. mobility
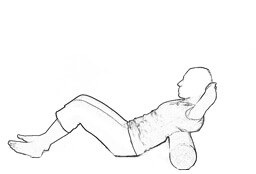
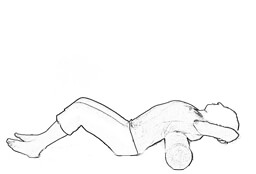
- Place your foam roller on the floor and lie on your back with your knees bent and the foam roller at the level of your shoulder blades.
- With your arms behind your head and your butt on the ground, lower your head as close as you can to the floor until you feel a stretch behind your back.
- Pause for a few seconds, and repeat 2-3 times.
- Tighten abs and maintain proper low back posture during the exercise.
- Straighten out back before moving to the next section of your back.
- Move about an inch either up or down the spine, making sure to stick within the mid to upper back. Don’t go past shoulders or into the low back.
Foam Rolling Thoracic Extension
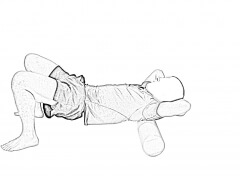
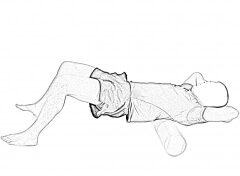
- Lie on the floor over a foam roller with the roll perpendicular to the body, knees bent, and interlaced hands supporting the back of the head.
- Keep the lower core activated and the low back curled, and the chin tucked throughout the exercise.
- Lift your butt up off the ground, and push with your legs to roll your back along the roller and then back.
- Be sure not to arch the low back or neck.
- The back should roll up or down several levels to loosen the entire stiff area.
Release With Ball
Plantar Fascia Release
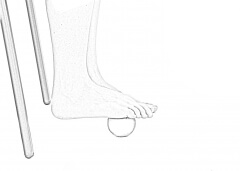
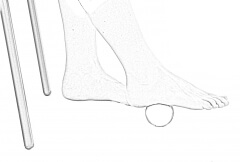
- Sit on a straight back chair with one foot on a ball, the other foot flat on the floor and your back in a neutral position (slightly arched).
- Roll the ball under the arch of your foot from heel to toes.
Calf
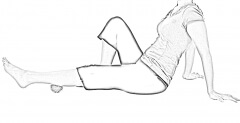
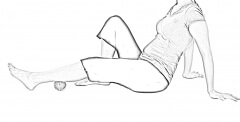
- Sit on the floor with one leg straight and your arms behind.
- Position the ball so it is under your calf.
- Roll over the ball to massage the area.
Hip Flexor
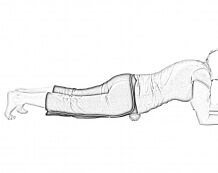
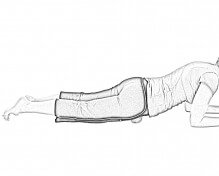
- Lie down on your stomach, supporting your weight on your elbows, knees, and feet.
- Position the ball under your hips and roll over the to massage the area, one side at a time.
- Do not go higher than the bony part in front of your hips (anterior superior iliac spine).
Glutes
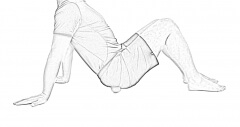
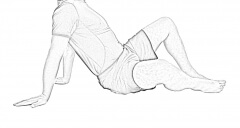
- Sit down on the floor and position a ball under and slightly to the side of your hip.
- With the ball still, externally rotate your leg by lowering your knee towards the floor.
- Lift your knee back to the center and continue the motion to release the area.
- You can also roll the area over the ball to massage and relax the glutes.
Back
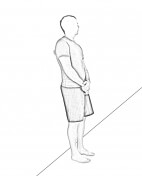
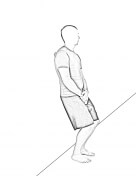
- Stand against a wall with a ball between your tense muscle region and the wall.
- Apply static pressure or roll the ball on and around the tender point.
- Focus on the muscles, not on the spine.
Levator Scapulae


- Stand against a wall with a ball placed on your upper back above your scapula (on the Levator scapulae muscle).
- Apply a comfortable pressure (“feel good” pain).
- Keep the pressure, move your body up and down and slowly roll the ball along the muscle.
- You can pause on the tighter spots for up to 30 seconds.
- You can vary the direction of the rolling and switch for a more horizontal style if you want to.
Pectoral
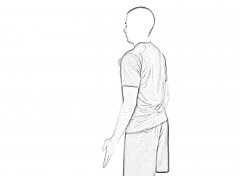
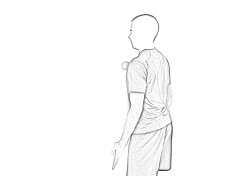
- Standing against a wall, place a ball on your pectoral muscle with your palm facing outward.
- Apply a comfortable pressure.
- With the applied pressure, roll the ball from your sternum (middle of chest) to the shoulder in a slight diagonal motion staying off all bony structures.
- Ensure you continue to breathe throughout.
- Repeat on opposite side.
Triceps
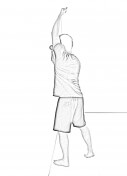
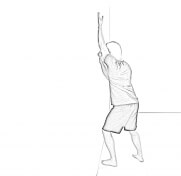
- Start standing next to a wall and place a ball under your arm, on your triceps, with your arm overhead.
- Roll your arm over the ball to release your triceps.
- If you encounter a tender point, you can hold the ball on the spot and bend and extend your elbow until you start experimenting with positive changes in tenderness.
- Focus on the tender areas.
Chapter Selection
Don’t miss out!
Subscribe to our newsletter to get your free copy of our stretching guide and get notifications when we make a new post to help you reach your fitness goals.
- Howley, E. T., & Franks, B. D. (2007). Fitness Professional’s Handbook (5th ed.). Champaign, IL: Human Kinetics.
- Moore, K. L., & Dalley, A. F. (2006). Clinically Oriented Anatomy (5th ed.). Baltimore, MD: Lippincott Williams & Wilkins.
- Nieman, D. C. (2011). Exercise Testing and Prescription: A Health-Related Approach (7th ed.). New York, NY: McGraw-Hill.
- Sá, M. A., Neto, G. R., Costa, P. B., Gomes, T. M., Bentes, C. M., Brown, A. F., et al. (2015, Mar 29). Acute Effects of Different Stretching Techniques on the Number of Repetitions in A Single Lower Body Resistance Training Session. Journal of Human Kinetics , 177–185.
- Sherwood, L., & Kell, R. (2010). Human Physiology: From Cells to Systems, First Canadian Edition. Toronto, ON: Nelson Education.